
Maintaining Sorli Harpsichords
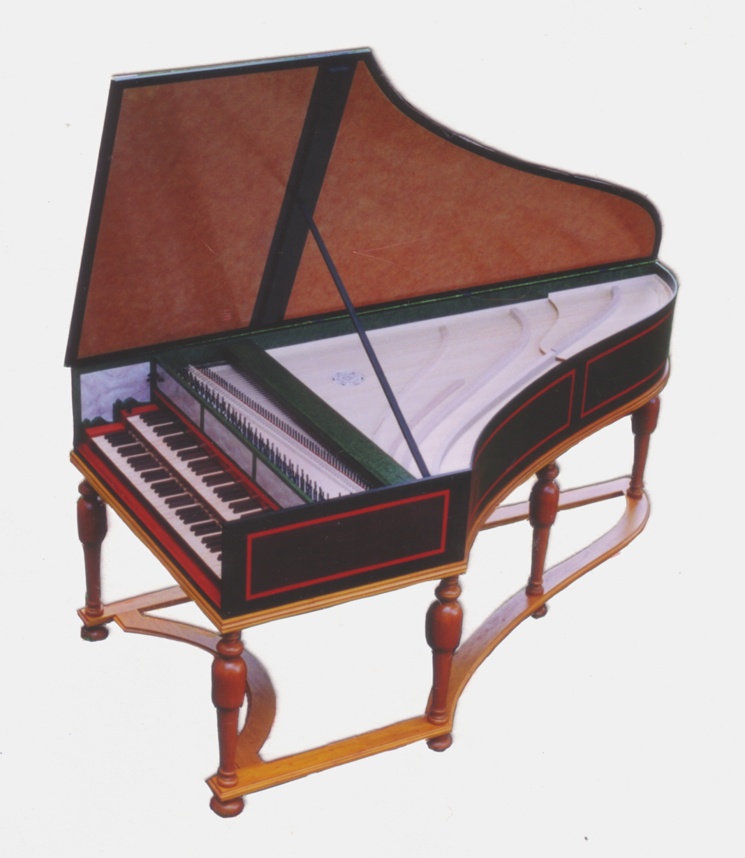
Keyboard Height Adjustment - Instruments by harpsichord builder, Steven Sorli are made from solid wood. Even wood with a protective finish will shrink and swell with changes in relative humidity. It is advisable to maintain the level of humidity in your music room between 45% and 75%. One adjustment you may have to make as result of a gradual change to a new level of humidity is the height of the keyboard. In the dry season, the case sides shrink and tend to lift the keyboard slightly (1/16"). This causes the jacks to rise as well. What you may notice is that most of the dampers are not damping, the plectra are too close to their strings and the key dip may seem shallow. In the humid season, the case sides swell and the keyboard falls. What you notice is that dampers tend to push strings sideways when moving the hand stop from off to on position and the key dip may seem deep.
The keyboard can be adjusted to compensate for these humidity changes. There are two screws in the bottom of the case to make this adjustment. Look under the case, directly below the two ends of the jack rail and about 2 to 4" in from the case sides. The screws are recessed into the bottom, so you will see holes about 1/4 inch diameter.
To make the adjustment, remove the jack rail so you can watch the jacks move up and down as you turn the screws. Decide which direction you want the jacks to move (up in the humid season or down in the dry season). Try to position yourself to observe the jacks as you turn the screw with a screwdriver (or allen head driver for single manual instruments). If jacks are too high, turn screw counterclockwise until the dampers make contact with the strings. Play a few notes at the end you are adjusting. Some players prefer absolute damping, others allow a little resonance. Adjust the second screw and check dampers throughout the keyboard range. Be sure not to lower the keyboard too much. Check by moving hand stops on and off. The dampers should not push strings sideways. Make any further adjustment and finish by adjusting individual dampers at the jack itself. Most likely you will only need to make this adjustment twice a year, after the onset of the dry or humid season.
Voicing Harpsichord Jacks

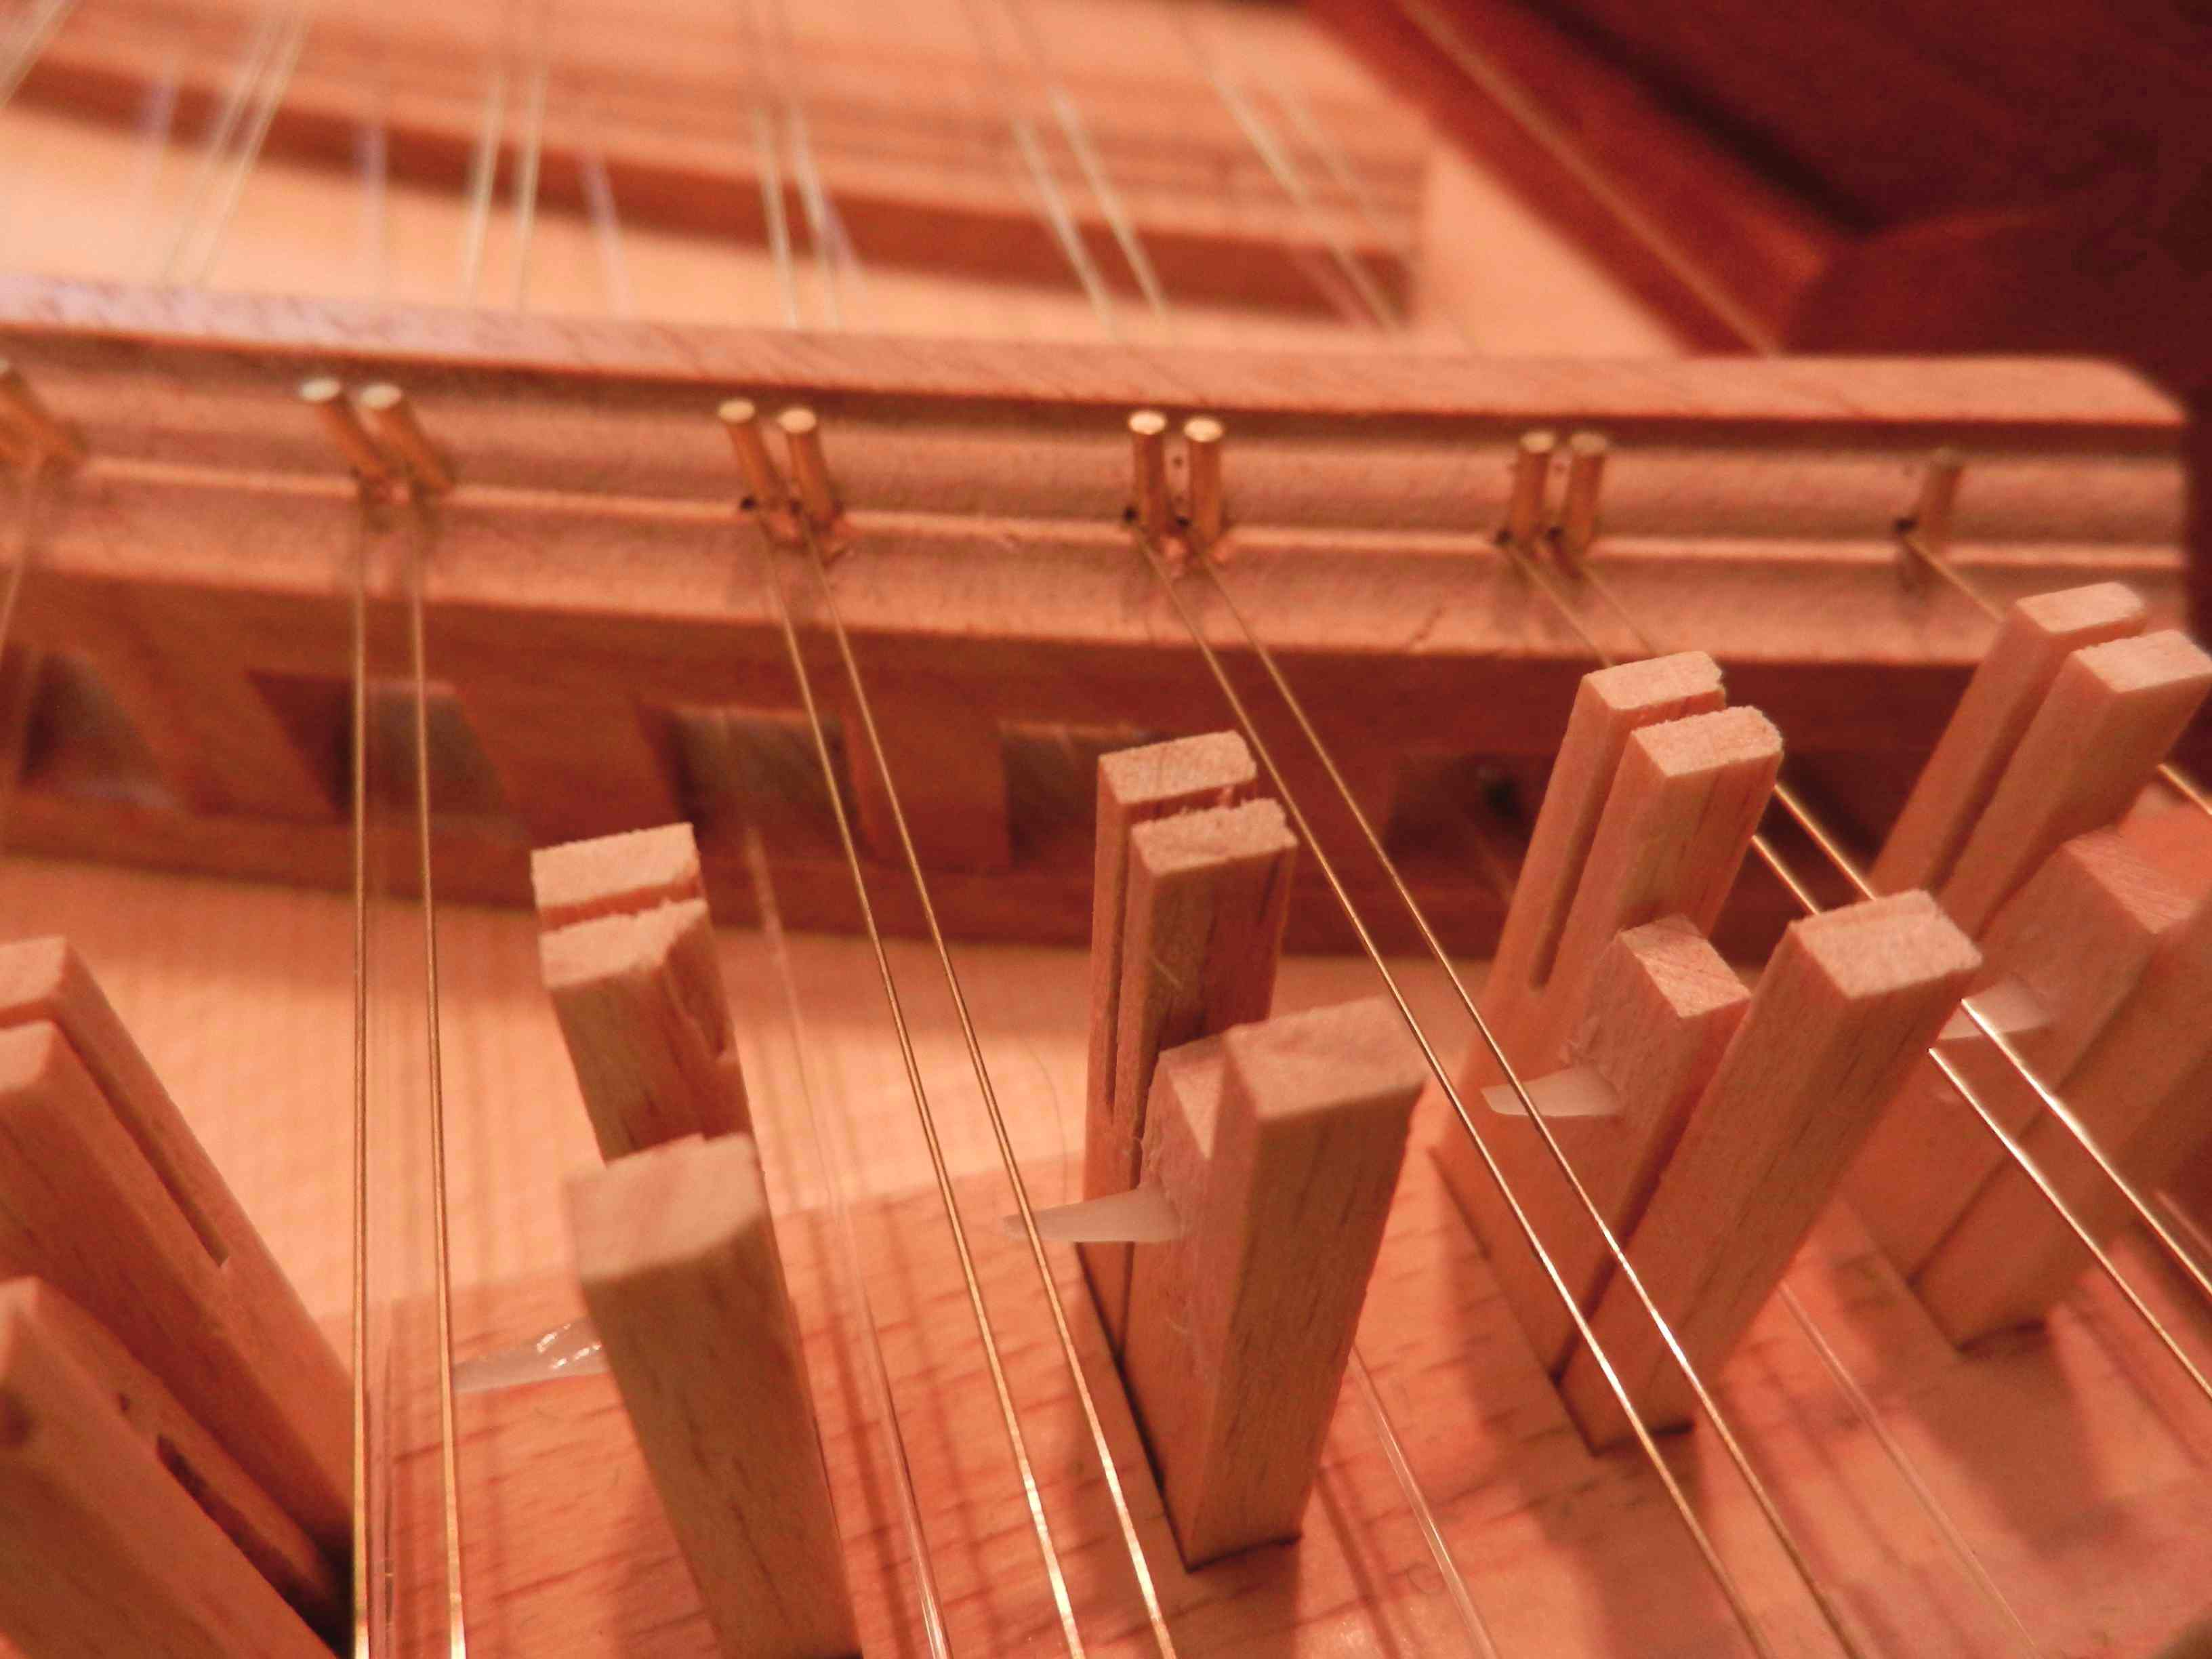
The procedure for replacing and voicing a Delrin plectrum is as follows: Use a small pliers to grasp the plectrum and push it out the back of the jack tongue. Insert the new plectrum, with any curve pointing upwards, into the back of the tongue and wedge it firmly in place. You can use the pliers to squeeze it tight or place the jack and tongue face down on a block with the plectrum overhanging the block. Use a small screwdriver to push it firmly in place. Adjust the top adjustment screw so that the back of the tongue is slightly proud of the jack body.
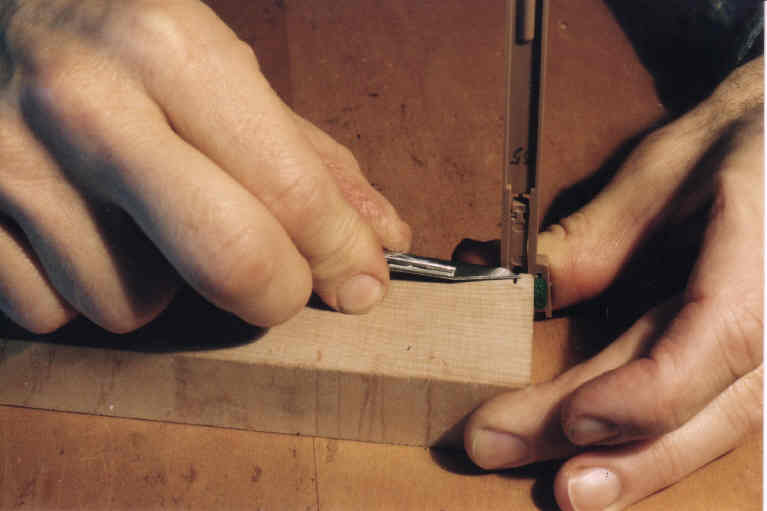
The plectrum is now much too long and thick and needs to be trimmed to the proper shape. Start by shaving the sides of the plectrum to taper the width down to an almost point at the tip. Use the sharp voicing knife supplied with your harpsichord. Place the jack in the instrument and check how much needs to be cut off the end to obtain the correct length. Make a chopping cut at the tip at a 70 degree angle. Check the length and make any adjustments with the knife or adjustment screw. Play the note to check the volume. It most likely will be too loud and the trimming should now be done on the underside of the plectrum, tapering the thickness gradually from base to tip. Have the jack upside down against the voicing block as shown in the above photograph. Start with the blade flat down on the plectrum and rotate it so the edge begins to cut into the surface of the delrin. Carefully push out towards the tip and take a very fine shaving off the plectrum. Always be aware of how the rotation of the blade effects how fine a shaving is being removed and adjust this rotation as you are sliding the blade toward the tip.
Remove and examine an adjacent jack that plays well to determine the proper shape and taper of the plectrum. Keep testing the new plectrum for volume after each shaving removed. If it becomes too weak, start over. When you are pleased with the sound and volume, raise the jack with its key, hold it there and stop the string from vibrating with your other hand. Let the jack down extremely slowly to make sure it does not hang on the string. If it does, cut a cleaner end bevel and adjust the length with the adjustment screw. If it still hangs, try weakening the tongue spring with a tweezers.Bend the spring in the direction that would cause it to weaken. For more information about harpsichord regulation and voicing refer to the book: The Harpsichord Owner's Guide by Edward L. Kottick.
Procedure For Regulation: 1.) Check "off" position of all registers that will turn off. The plectra of any notes that sound in the off position should be cut shorter. Cut a clean bevel at the plectrum's tip. 2.) Check for evenness of volume. Trim plectra of loud notes as described above. For soft notes, advance plectrum and cut it to length. Plectrum may need replacing if it cannot be advanced. 3.) Check staggering. When more than one stop is engaged at a time, the jacks should pluck successively rather than simultaneously. If two jacks pluck at the same instant the action will be heavy. Use the bottom adjustment screw to regulate the plucking order. Find notes nearby that play comfortably and match the plucking order to be the same. After making an adjustment, check that the plectrum will fall below the string when let down slowly and be sure the damper is damping properly. 4.) Check all dampers. Watch strings as you turn a stop on and off. If a string is being pushed to the side by a damper, the damper should be raised slightly. Any dampers that are not damping properly should be lowered. Use the needle-nose pliers to grasp the damper and slide it up or down. After making an adjustment, check that the plectrum will fall below the string when let down slowly. If it hangs on the string the damper is too low. You may need to screw in the bottom adjustment screw to provide more space for everything to work. Then check staggering again. 5.) Check slow repetition. Play each note, dampen the string with a finger and let the jack down very slowly. It should not hang on the string. If it does, cut a cleaner bevel at the tip and adjust the length with the adjustment screw. If this fails, weaken the tongue spring by bending the spring. 6.) Check for quick repetition with the jack rail in place. Write down any notes that do not repeat quickly. Usually tightening the tongue spring will help. Always check that the plectrum does not hang on the string after tightening spring. Another cause is a plectrum that is too close to the string. Screw in bottom jack screw, adjust staggering and dampers. Or the damper may be too low. A sticking jack or key may also be the cause. File jack slot or free key.
Procedure For Tuning Harpsichords
The most difficult aspect of tuning is setting the temperament. This can be done by ear with the help of the pamphlet The Equal-Beating Temperaments by Owen Jorgensen. An easier approach is to use an electronic tuning device such as an app on your phone or the Korg Chromatic Orchestral Tuner OT-120. In addition to equal temperament it offers 8 of the most common historical temperaments. Using one of these temperaments will provide the most satisfying resonance from your harpsichord.
You only need to set the temperament to one octave of one of the 8' choirs. If tuning by ear, tune the octave just below middle c. I prefer to tune the octave starting at middle c and above when using the Korg. In my opinion, tuning by ear to the generated tones provided by the tuner can be more accurate than using the pointing needle method. I find tuning middle c to the c4 tone (a lower octave) is easier to hear the beats and ultimately the lack of beats when the note is in tune. When a note is out of tune, you will hear the wavering vibrato-like sounds known as beats. As you change the pitch more in tune the beats slow down and stop when in perfect tune. When tuning, hold the T-shaped tuning hammer very lightly and use only your finger-tips to rotate the tool for the best sensitivity. Always first tune a note slightly flat and bring it up to pitch.
Once the twelve note octave is tuned, simply tune by ear all the other notes of the choir to that original octave. Work up the treble, tuning octave intervals and finally down to the bass end. Turn on the second 8' choir and tune this choir in unison with the one you just tuned. Shut off the louder 8' and tune the 4' choir to the softer 8'. Usually start at the bass end and work up to the treble.
Harpsichord String Replacement
If the tuning pins have holes for threading the string, it is not necessary to remove the pin to replace a string. Remove the jack rail and old string. Place loop of new string on hitchpin and use a small spring-loaded clamp to hold it in place. Cut string to length about 6" beyond tuning pin. Thread string into tuning pin hole and turn pin clockwise with the tuning hammer. Guide the string with a finger to wrap neatly around pin as you turn.
If your tuning pins do not have holes, you need to remove the pin by turning it counter-clockwise with a pulling motion on the hammer. If the pin seemed at all loose, put 2 or 3 mylar shims in the hole. Cut the shims about 1/8" above the level of the wrestplank. With the top end of the pin to the right, wrap the end of the string under the middle of the pin and spiral it widely down the pin once or twice. In mid-air with steady tension on the wire, turn the pin clockwise while orienting it so that the wire will wrap crossing tightly over the top-most spiral. Continue steady tension and using both hands, wind pin toward tuning pin hole and stop just above the hole. Cut the excess end wire hanging off pin with wire cutter and push pin into hole keeping it taught at all times. Use a small carpenter's hammer to bang the pin to the same height as adjacent pins. Rubbing rosin on pin before starting will help prevent the wire from slipping.
ssorli@gmail.com

